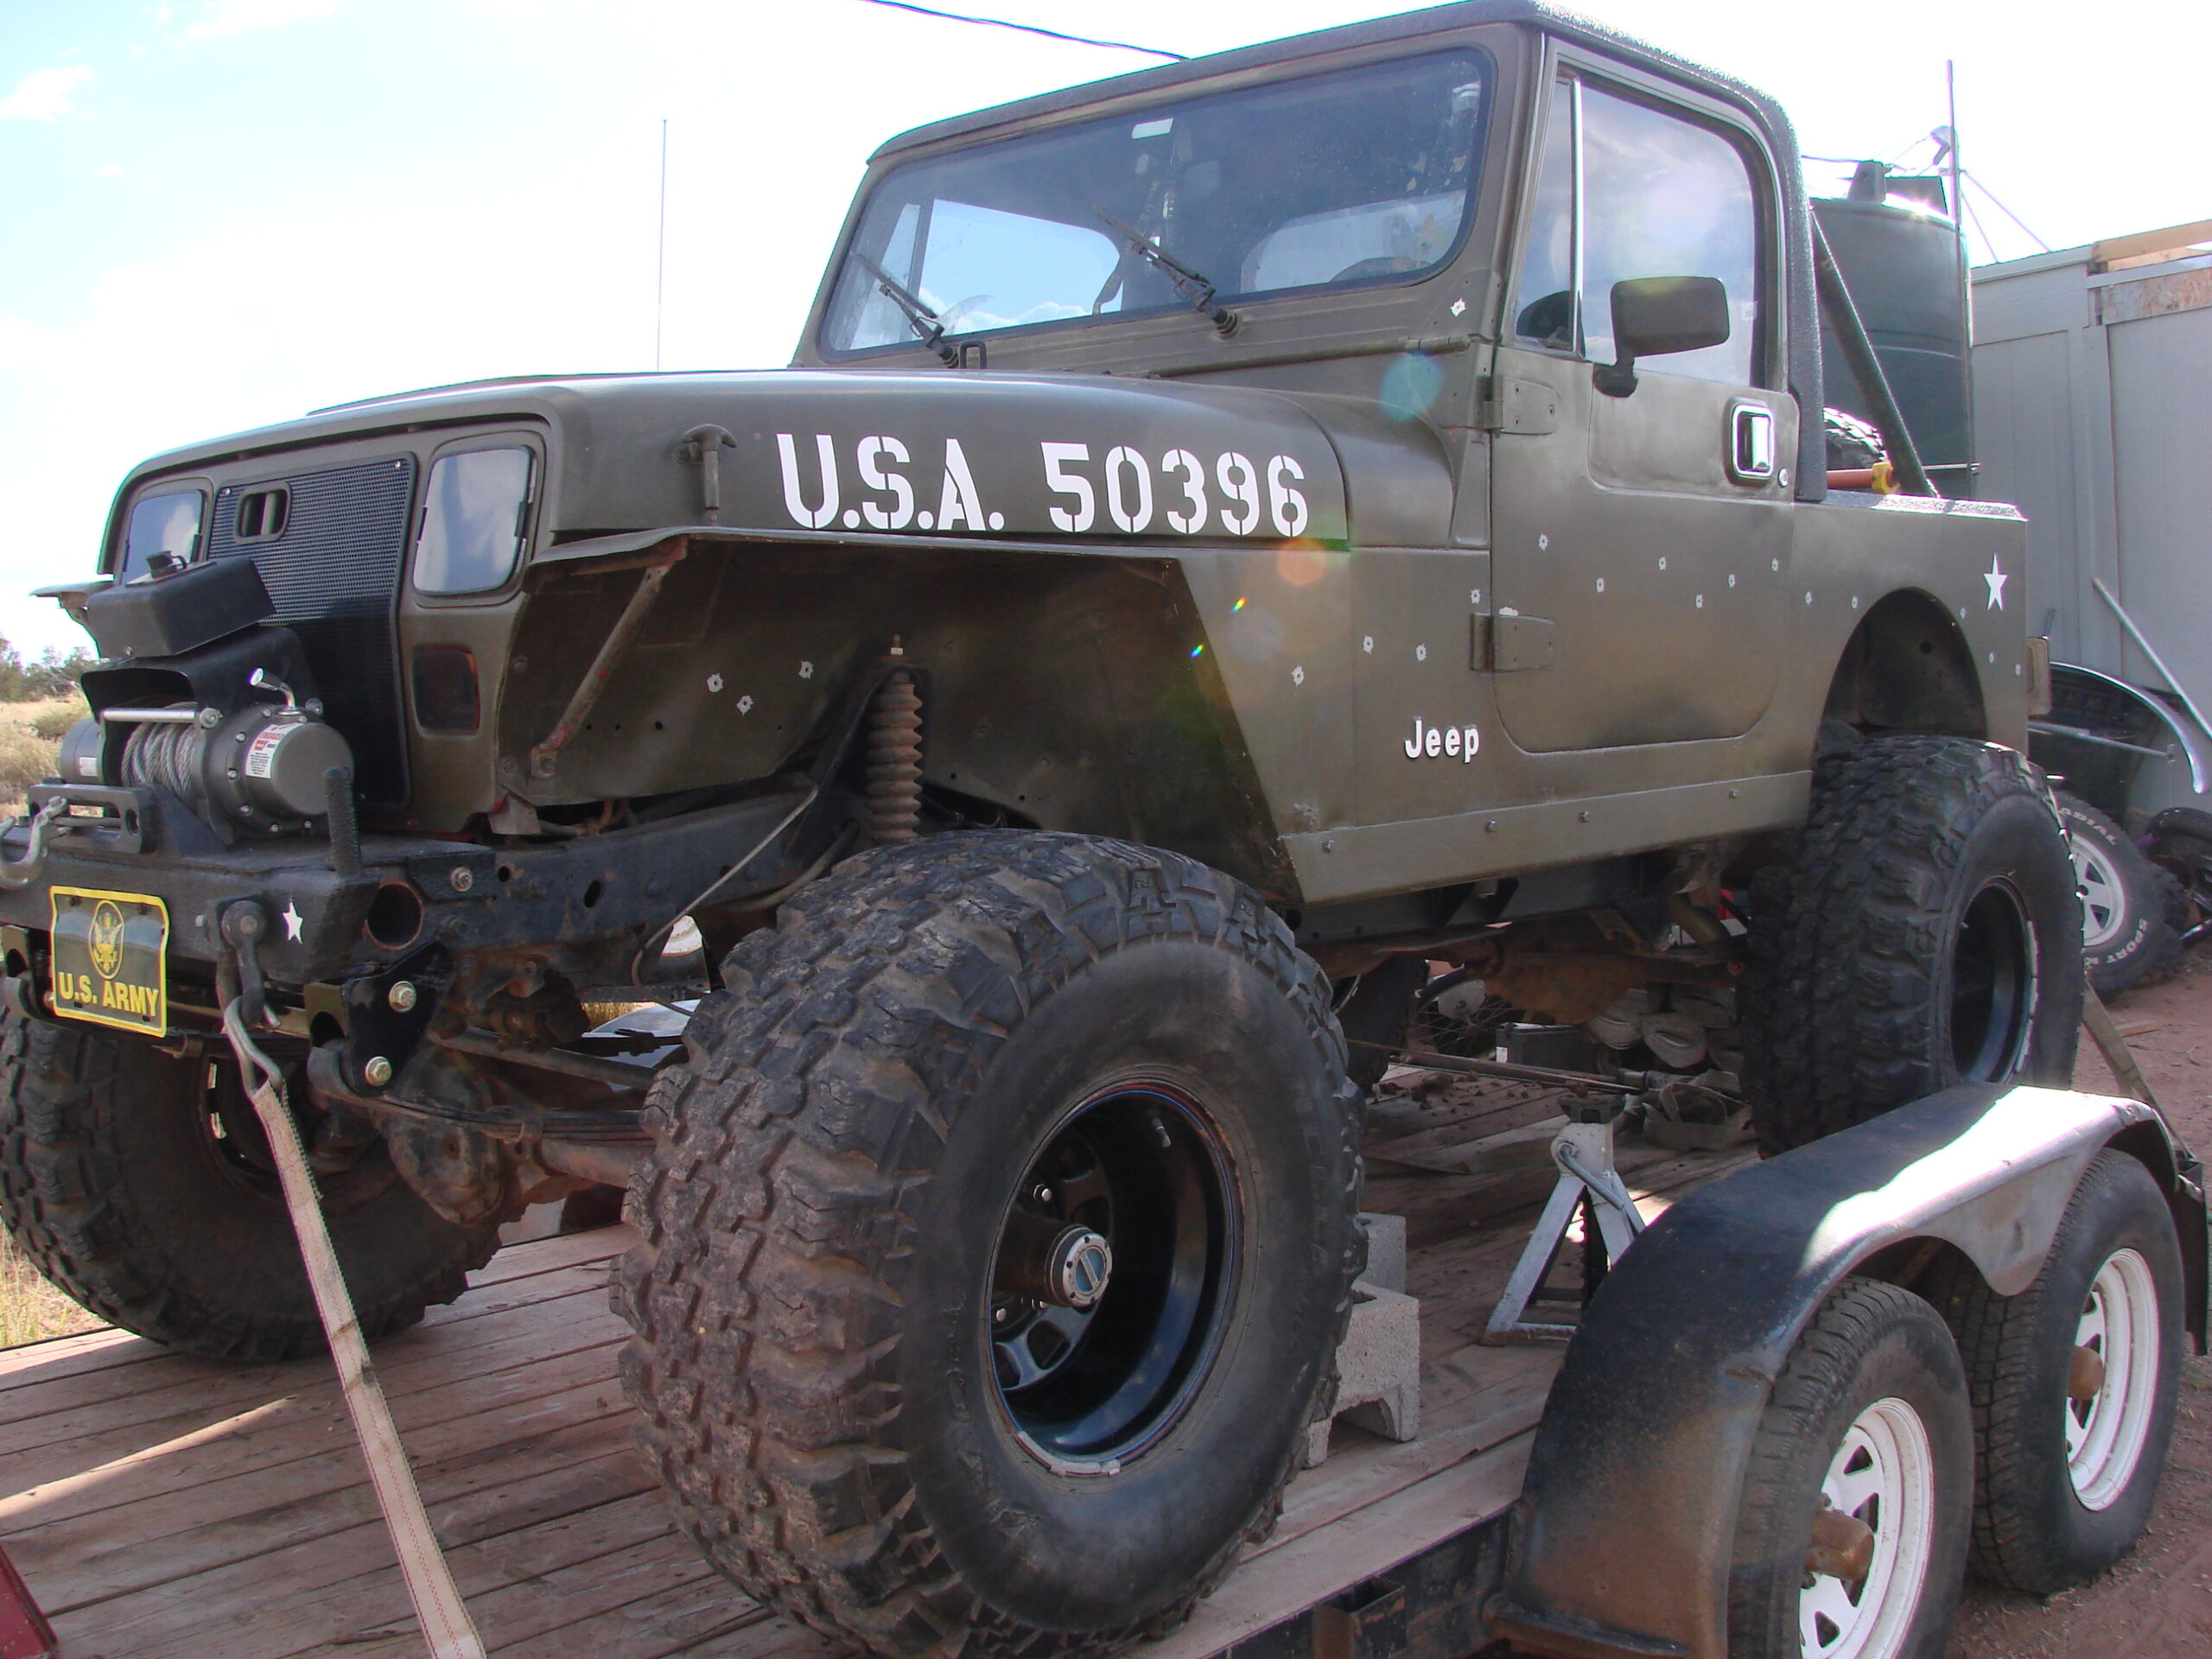
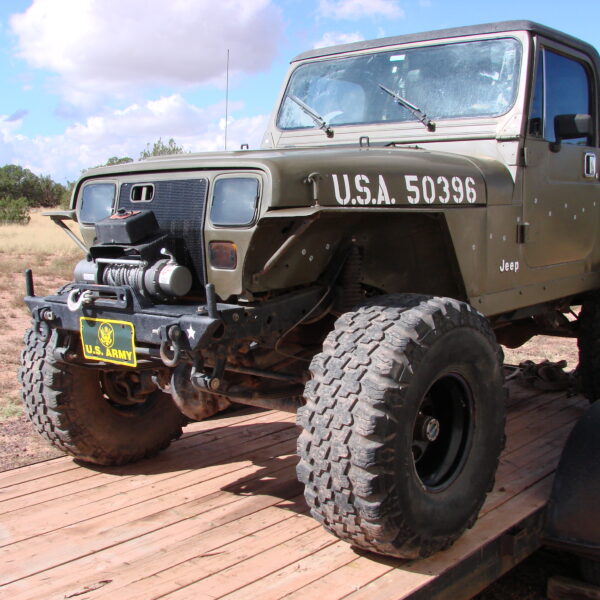
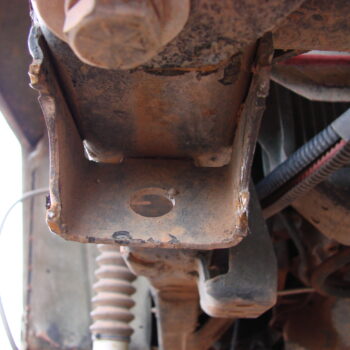
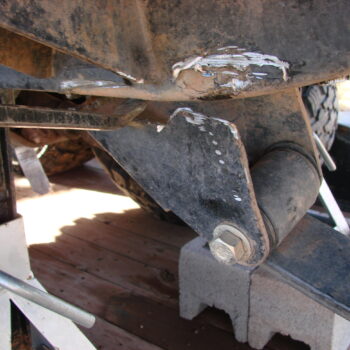
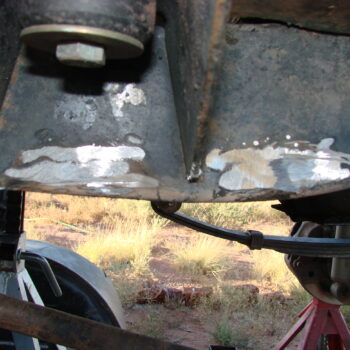
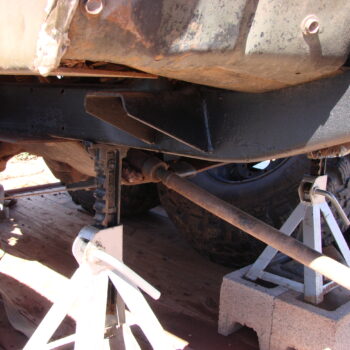
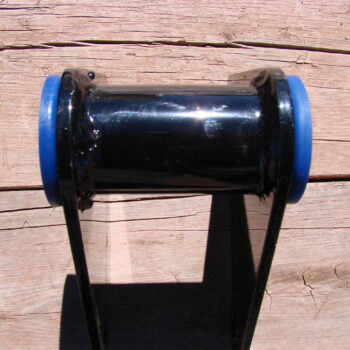
If any of you out there wonder if we at Jeep Lifestyles actually wheel or not you don’t have to look further than our project section and the product review page to know that we most definitely do. When living the wheeling lifestyle, things will break and when they do we try to showcase as many of the repairs or new products that we upgrade our own equipment with to show what works, how it goes together, and in many cases, our reviews of the product afterwards. This project is no exception, while out playing around in the rocks of northern Arizona I managed to rip the shackle to frame mounts off of my frame. I managed to get my Jeep back home and decided now would be a great time to do a shackle reversal kit. I have 36” tires on this YJ and it still handles and steers great on the road but since I have the task of fixing what I just broke I might as well go ahead and fix it with an improvement.


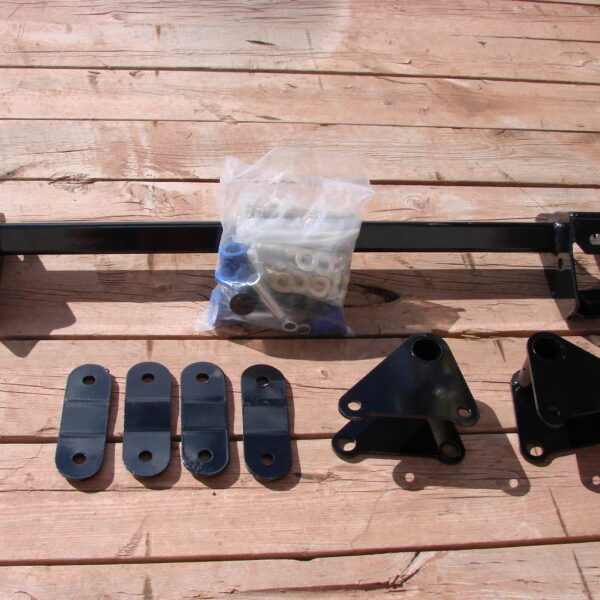
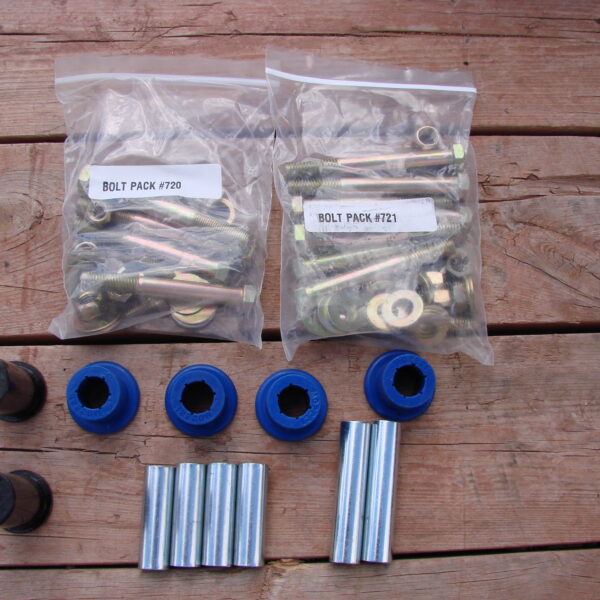
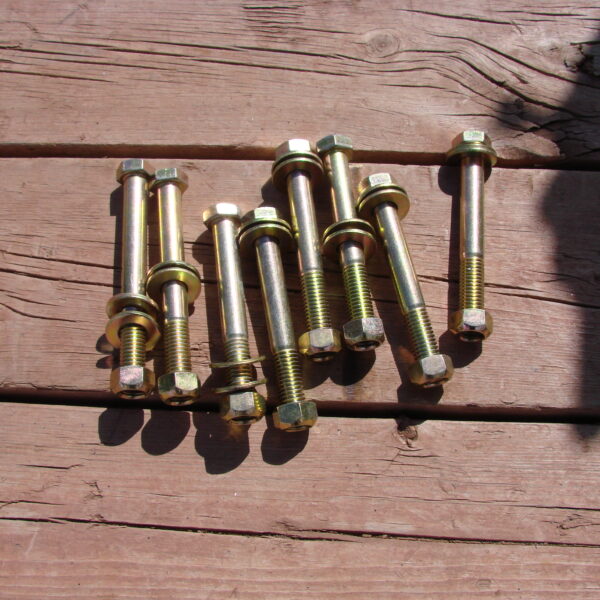
I have decided to go with a BDS shackle reversal kit to fix the breakage, in doing so it will help me with bump steer issues when traveling at higher speeds on the roads. This kit comes complete with all mounting hardware as well as installation instructions and everything needed to complete the job.

Now BDS provides detailed instructions and this write up will be an overview and install per my installation. Adhere to all warnings (pre and post install) and instructions provided with the kit. I will be quoting their install sheet in some areas but I will also be giving my two cents in other areas, but again, please go by and refer to all provided instructions and warnings from whichever manufacturers product you decide to go with.
BDS Shackle Reversal Kit Installation:
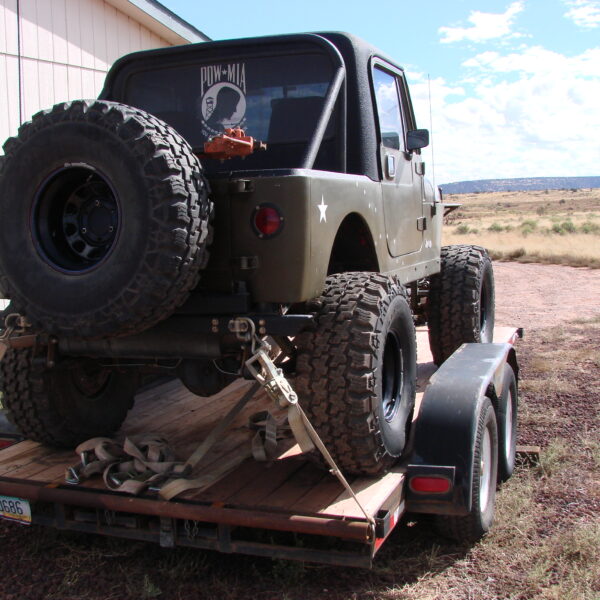
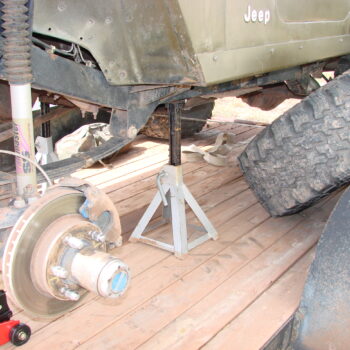
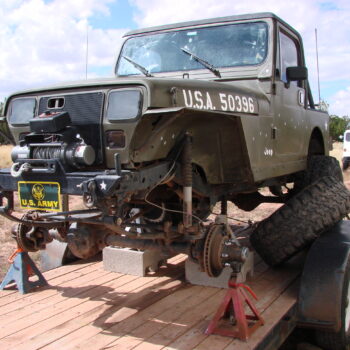
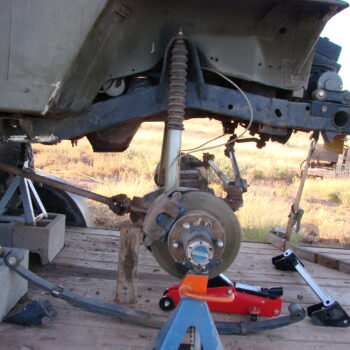
Since I don’t have any shop space to work with at the moment this job is going to be done outside and on a trailer so I have a level platform to work on. You want to make sure the vehicle is secure and will not be moving around on you while you have this much of the front end torn apart. And as luck would have it as soon as I get started the clouds and rain begin to move in (it never fails sometimes).

1) Park the vehicle on a clean, hard, flat surface and block the rear wheels. (Again, I had to use a trailer to have this).
2) Raise the front of the vehicle and support it with jack stands under the frame, behind the front spring pivot bracket. (As tall as my Jeep is I had to put blocks under the jack stands to allow them to adjust high enough to get the job done).
3) Remove the front wheels and tires.
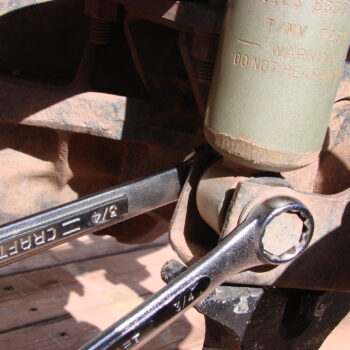
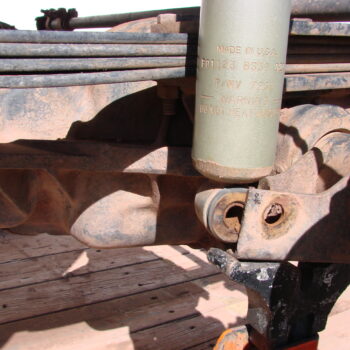
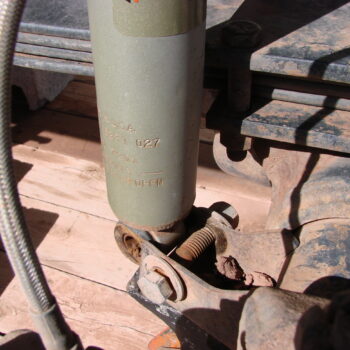
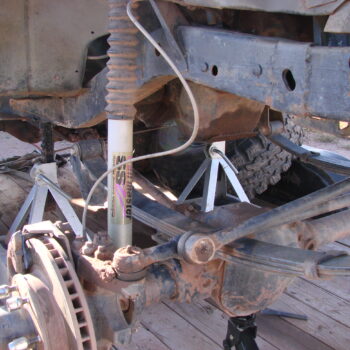
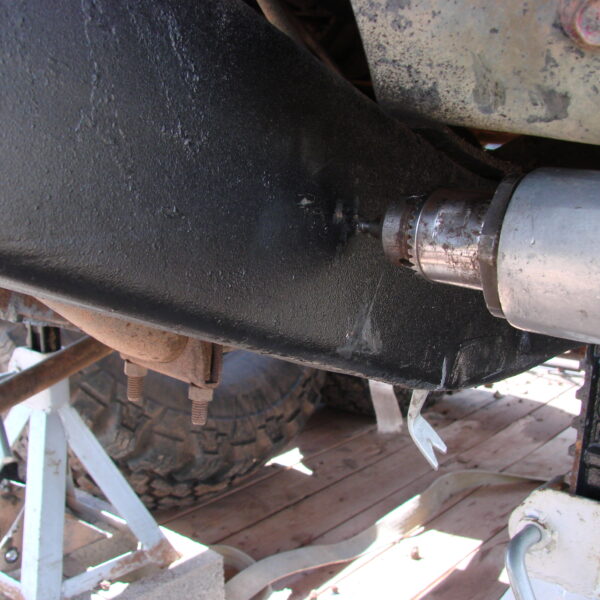
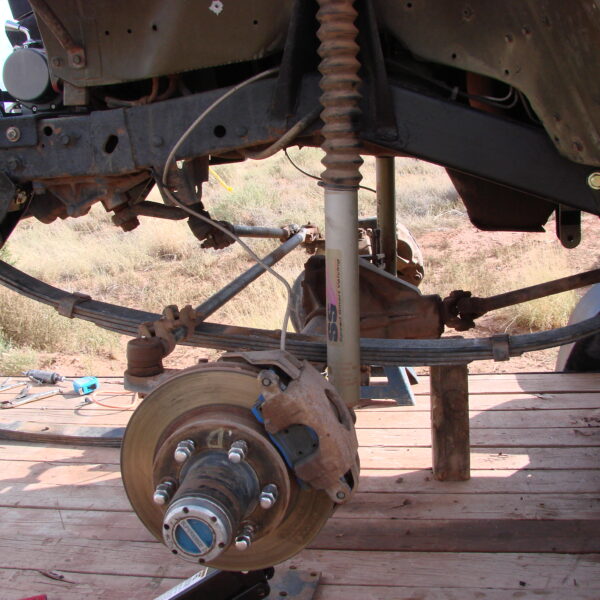
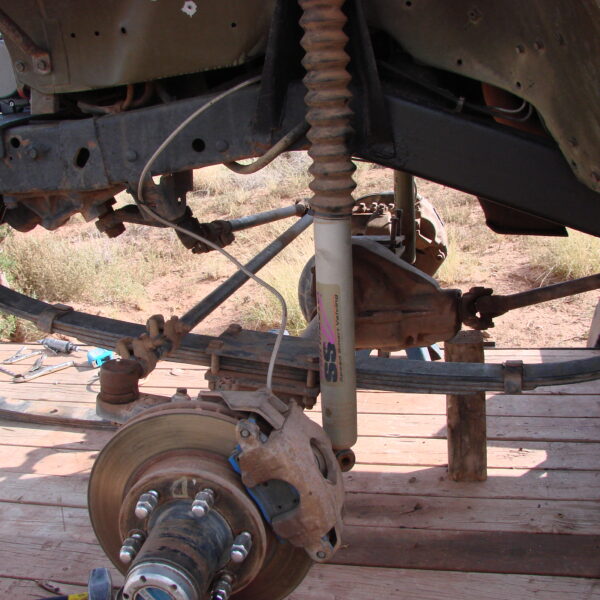
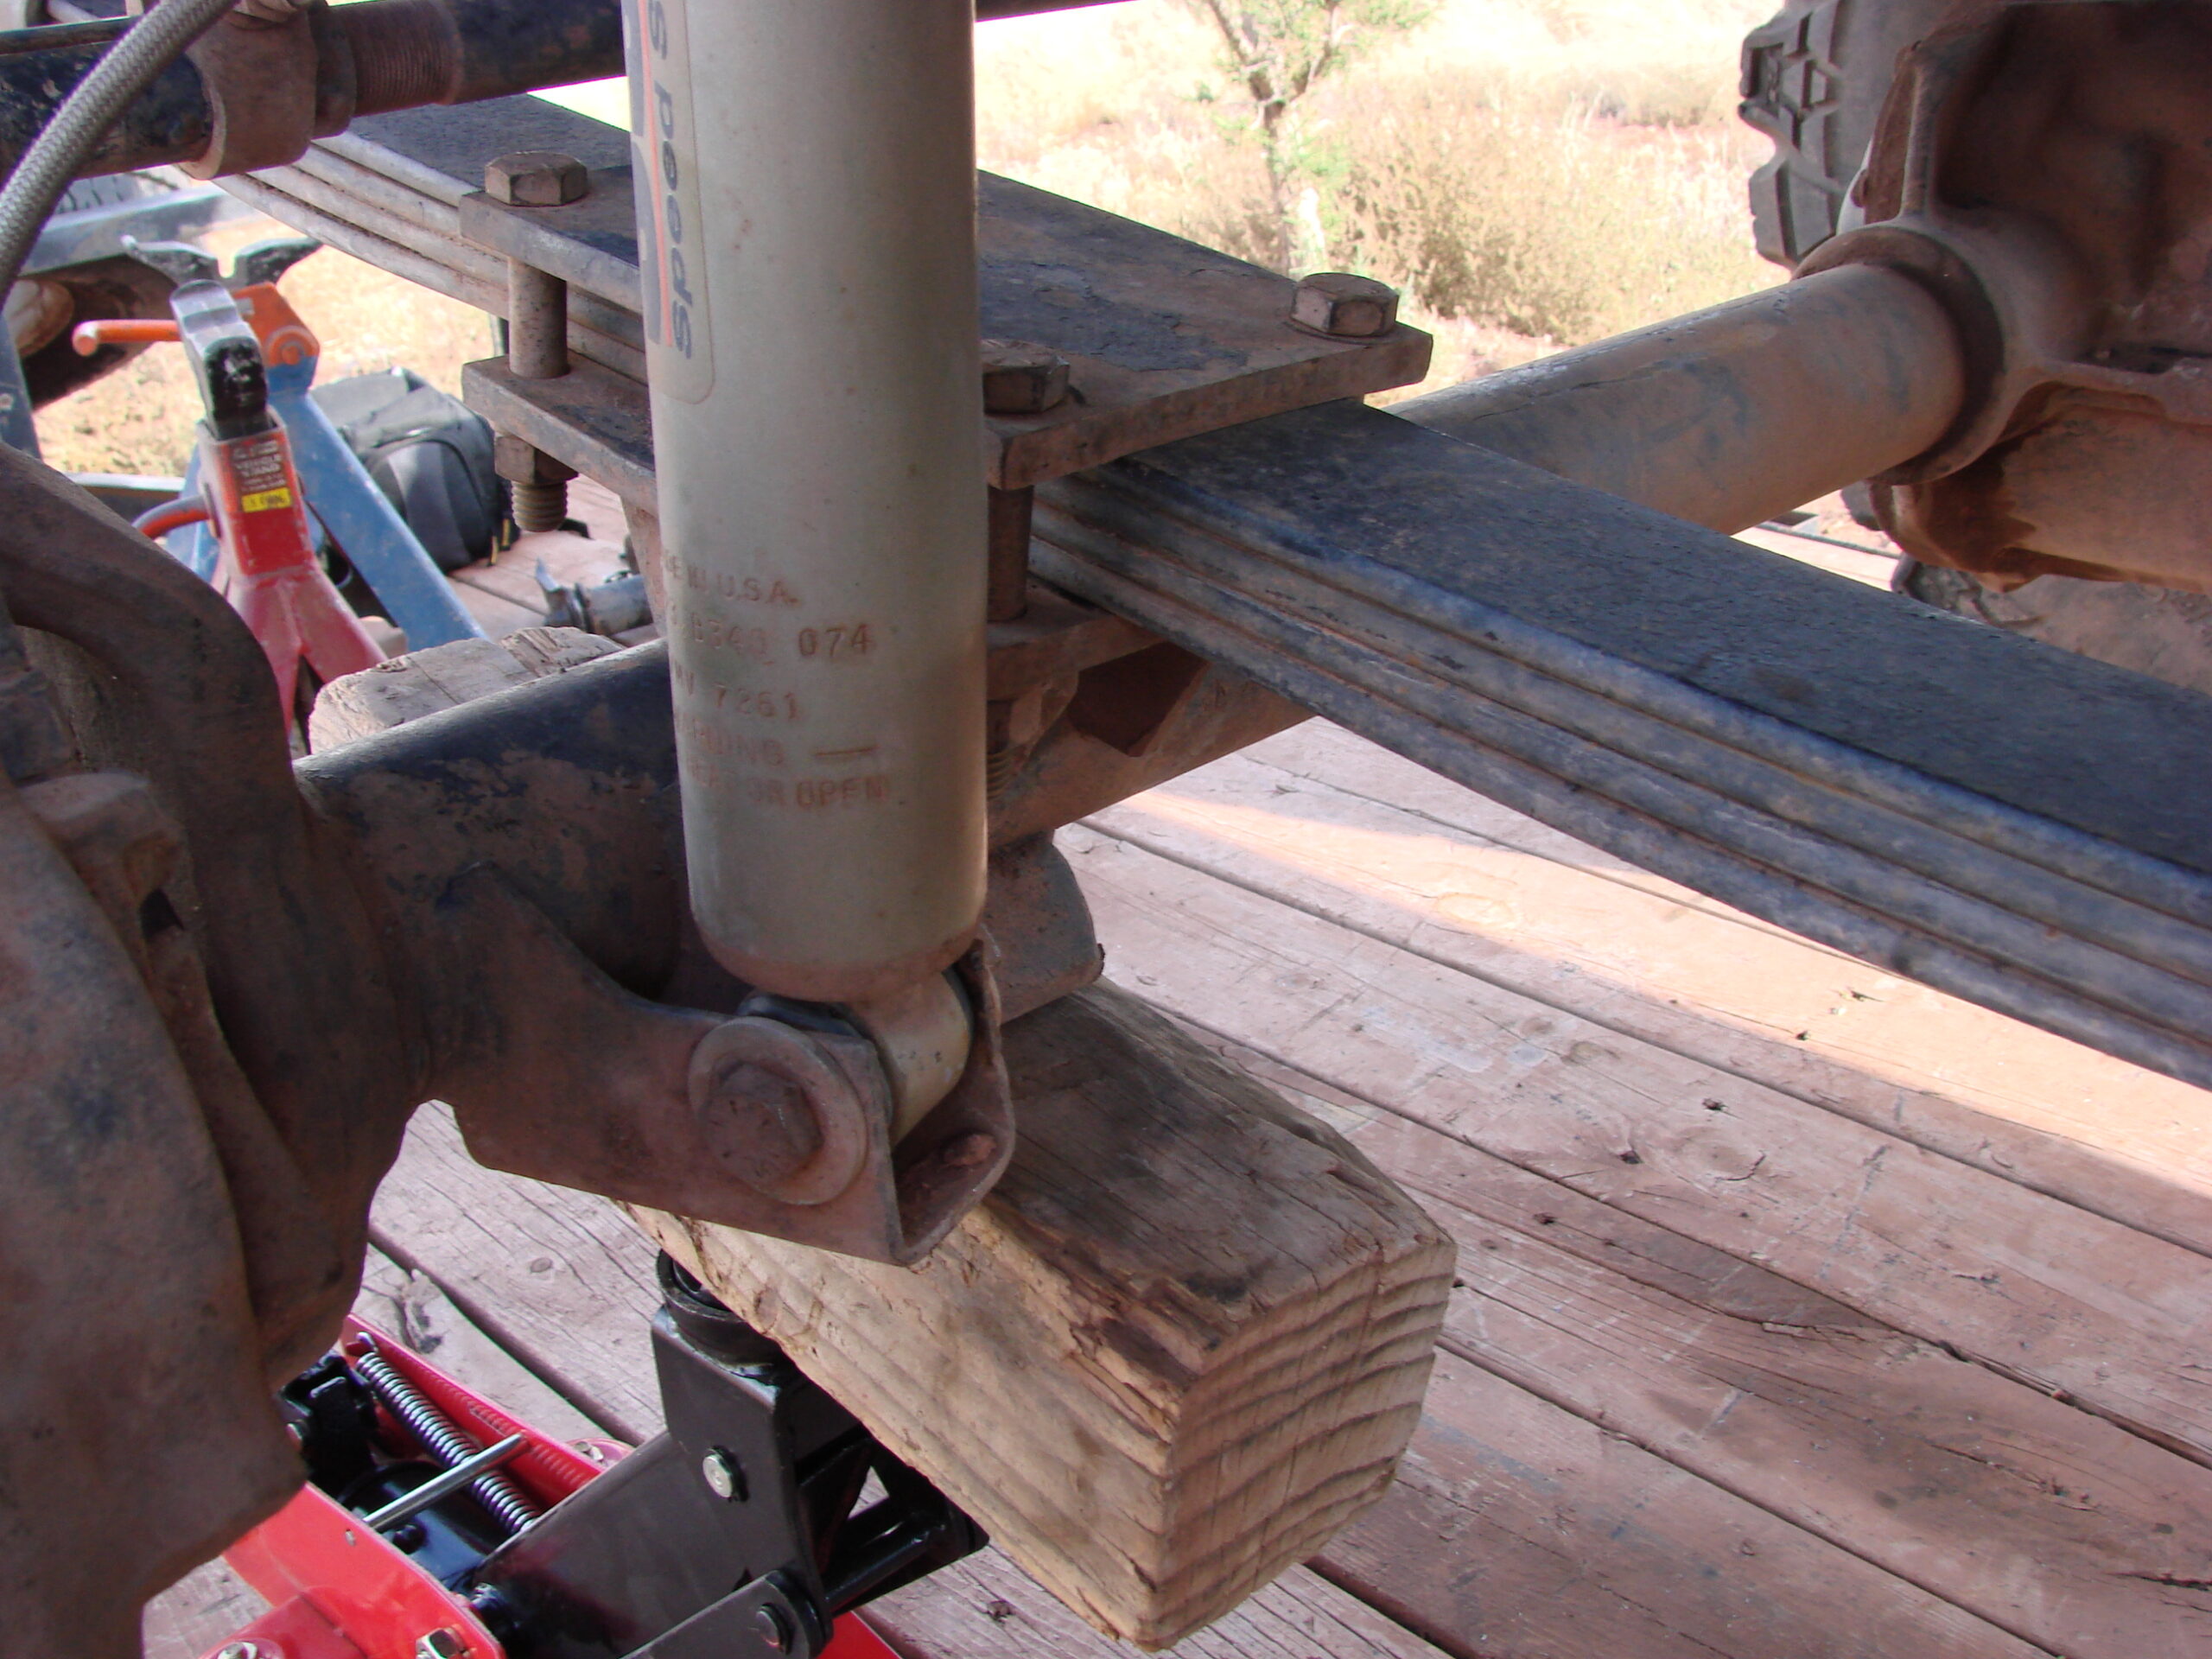
4) Remove the shock to axle bolts. I like to put bolts back in the spot I removed them from to help with relocating the right bolt to the location it came out of.
FRONT PIVOT BRACKET INSTALLATION:
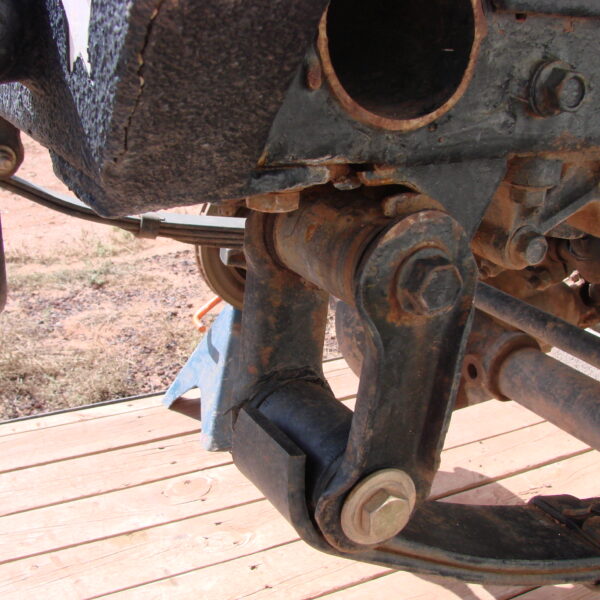
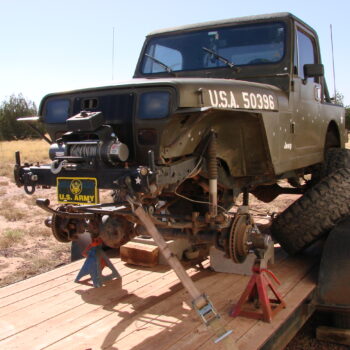
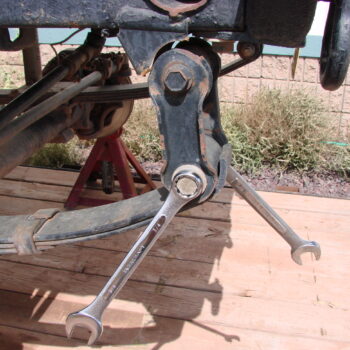
5) Support the axle with a jack so there is no weight resting on the springs. Remove the shackle to frame and shackle to spring bolts (this is an instance where my front was already torn apart so follow the instructions accordingly to remove your parts).
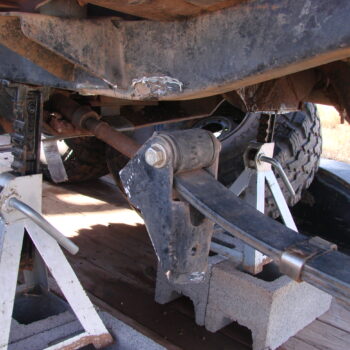
6) Lower the axle away from the front frame shackle brackets and support the axle with jack stands (you will also notice in the pics that I have strapped the Jeep down to fully secure it on the trailer to make certain it would not move, SAFETY FIRST!!)
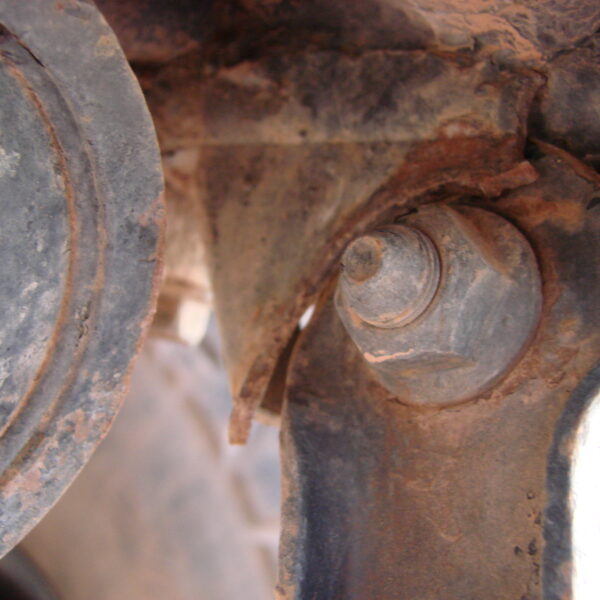
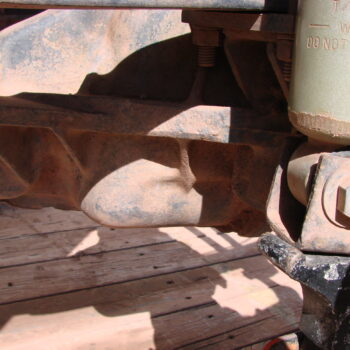
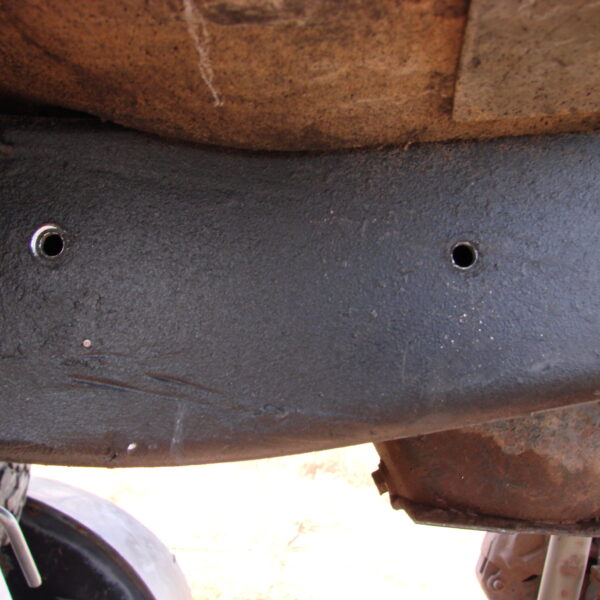
7) Remove the OE shackle bushings and sleeves from the frame and discard.
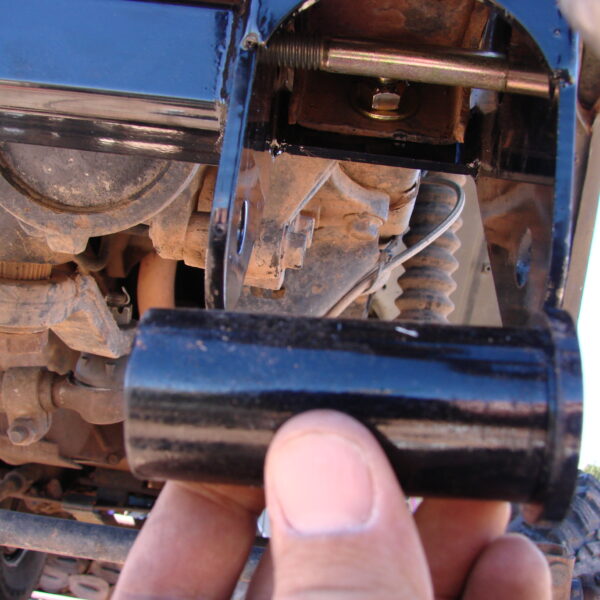
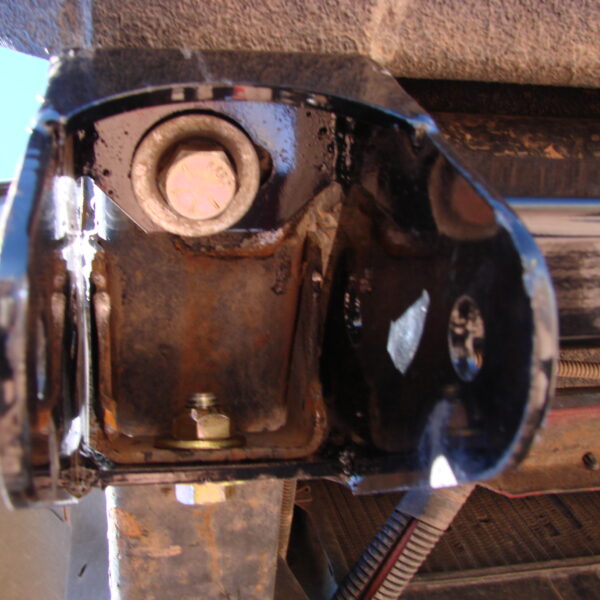
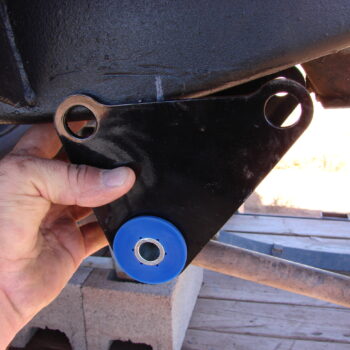
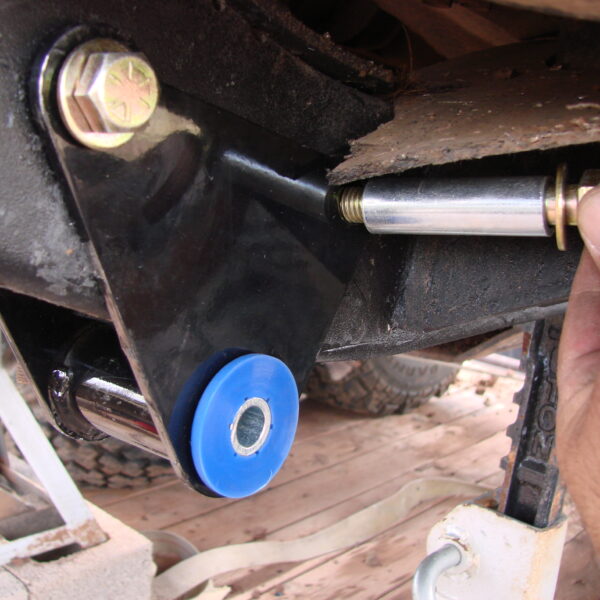
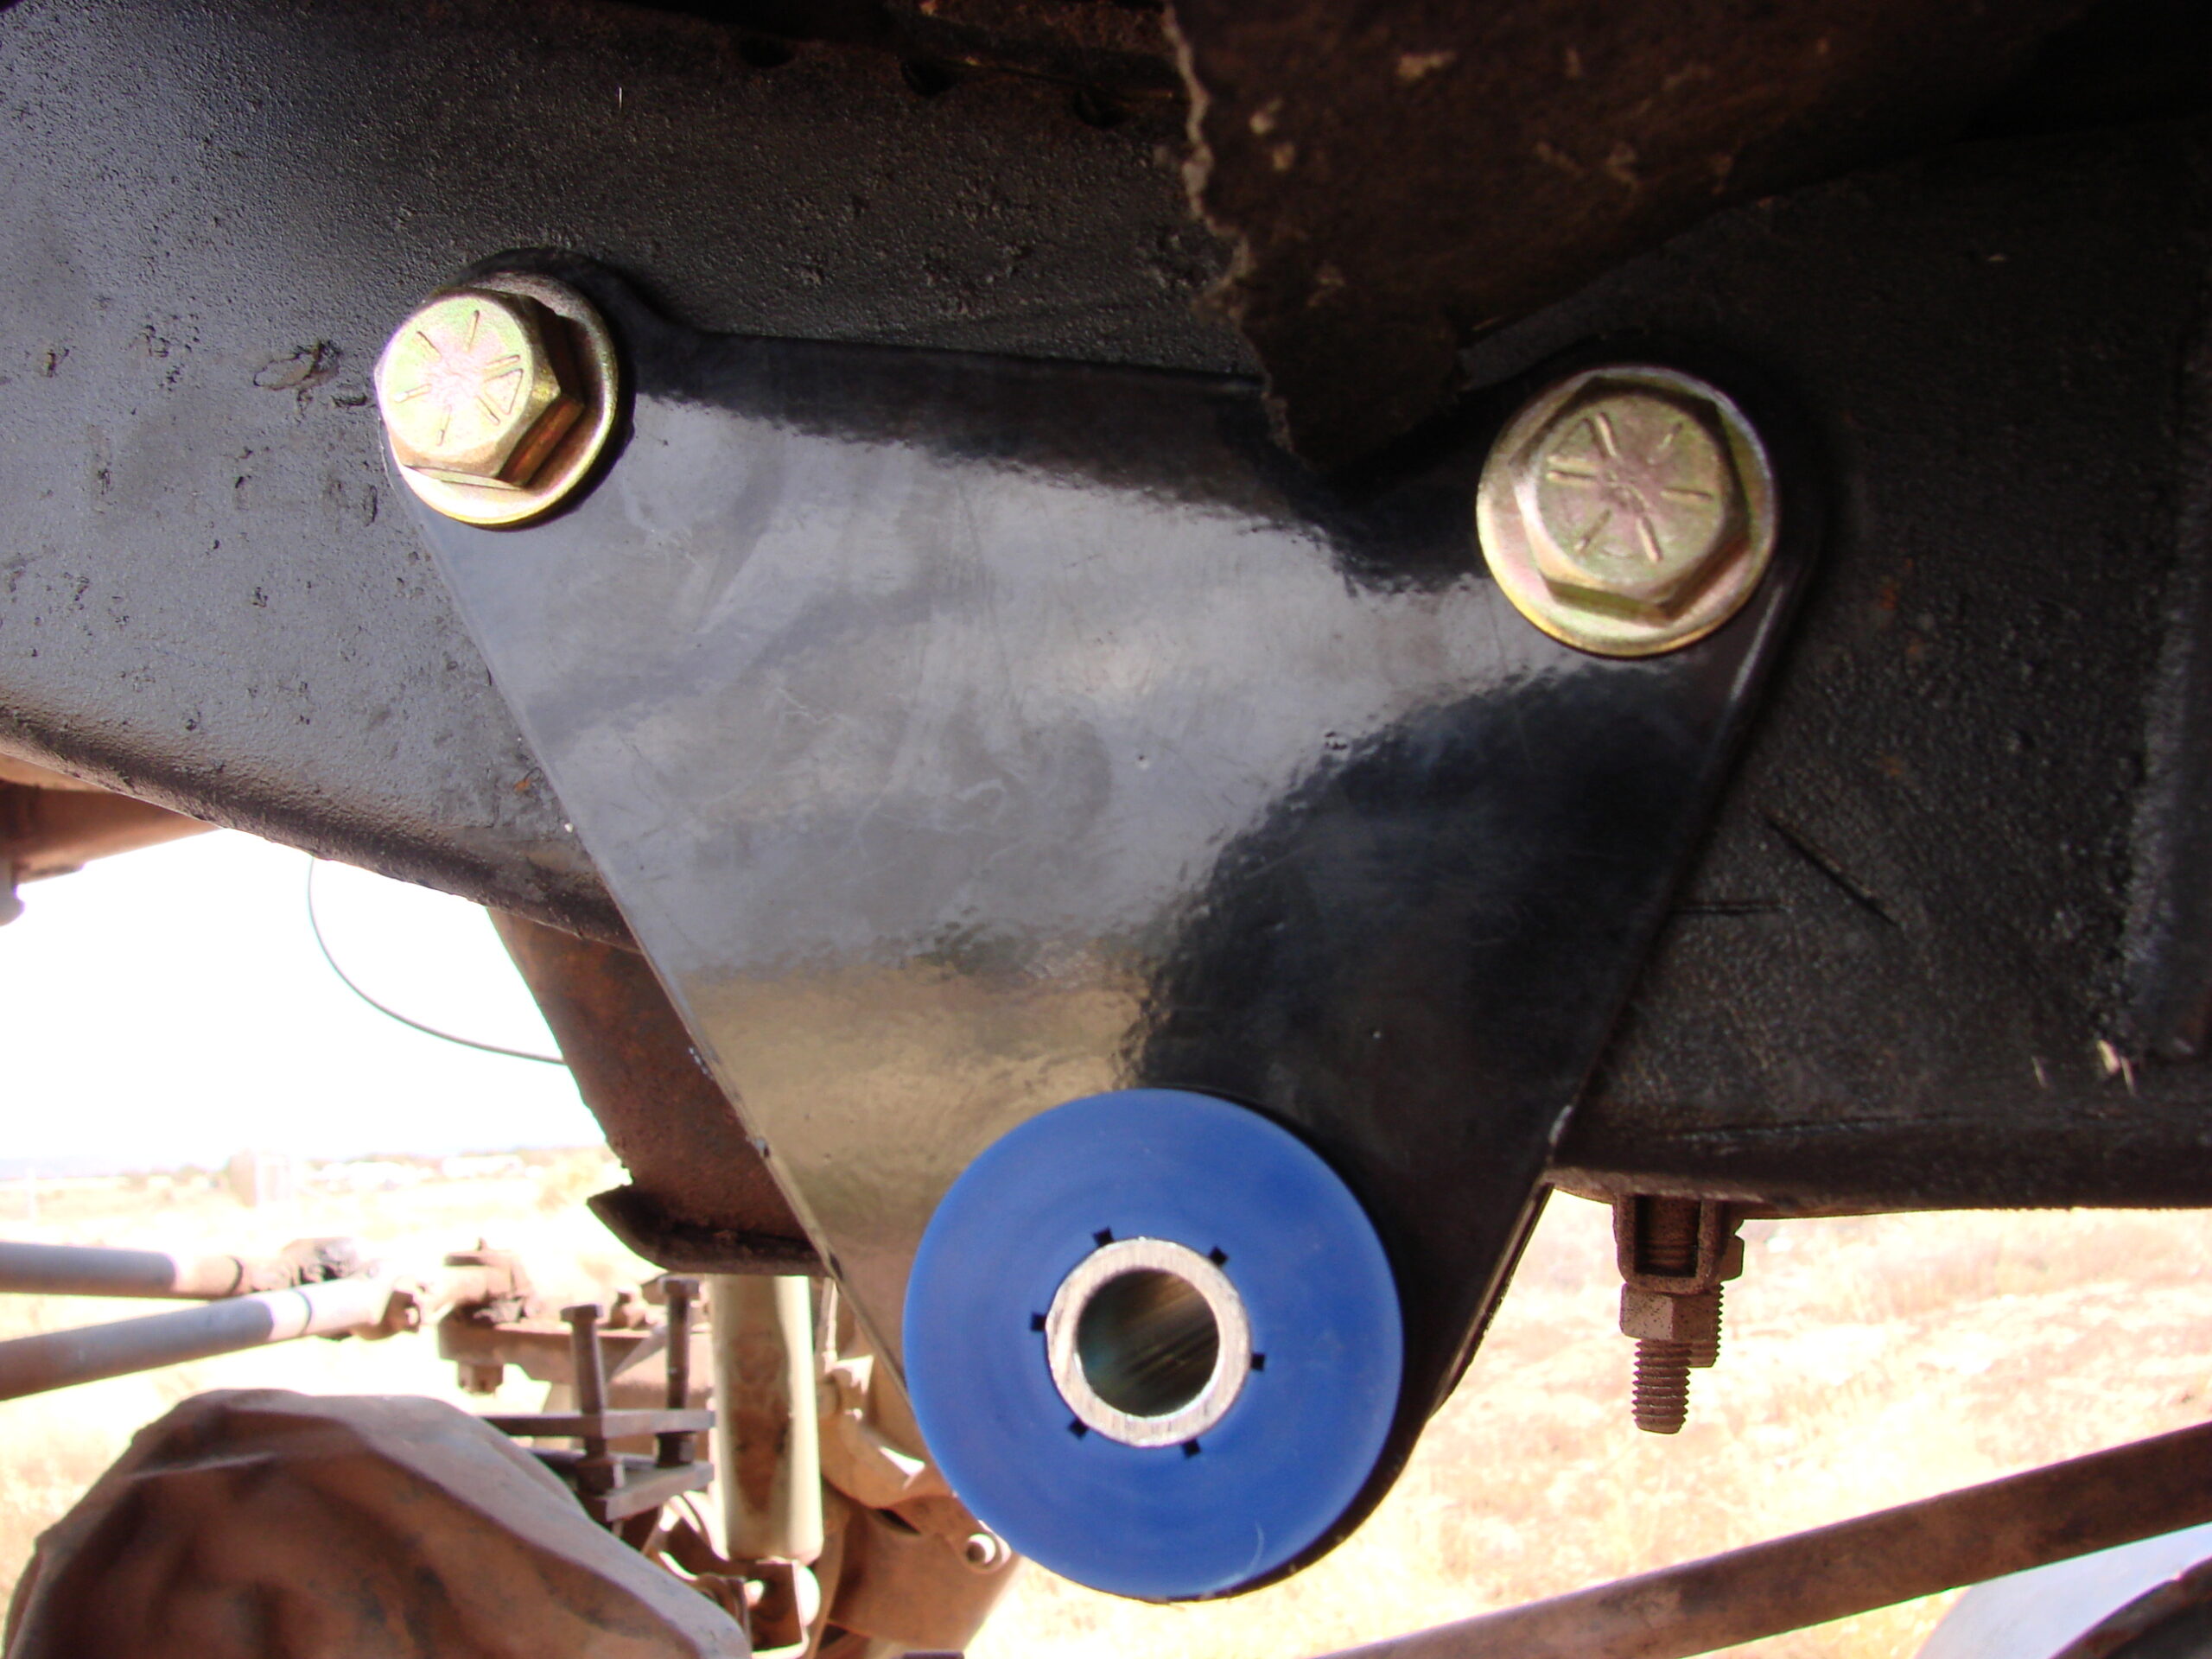
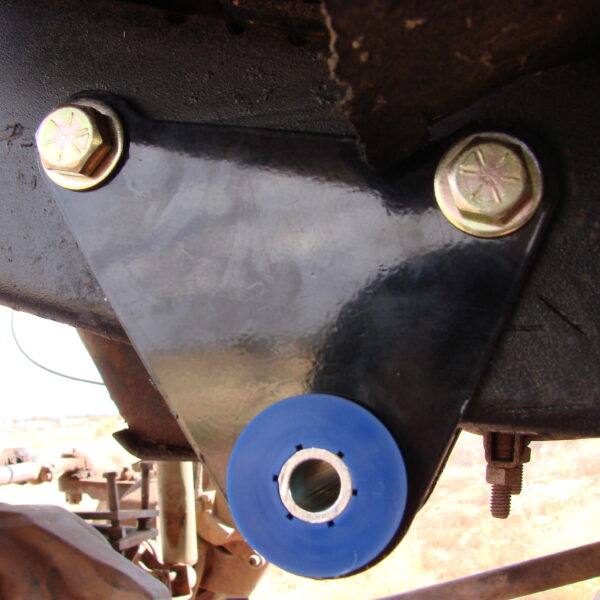
8) Install the frame spacer bushings in the front frame shackle bracket so the flange is on the outside of the frame (since my brackets are torn off I used the spacer still as support for the framework but it doesn’t fit into OE place since mine are gone).
9) Remove the front lower bumper mounting bolts from the frame and retain.
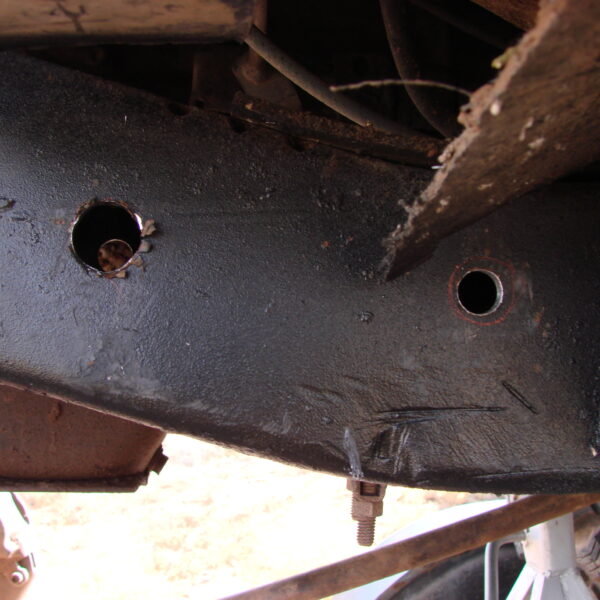
10) Install the front shackle reversal bracket assembly on the vehicle and loosely fasten using the stock bumper bolts.
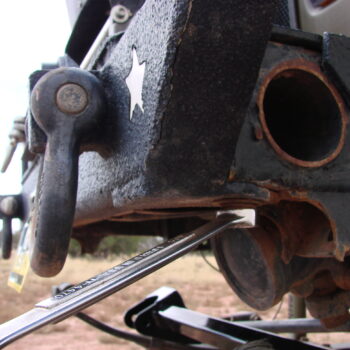


11)Line up the holes in the bracket and frame spacer bushings. Fasten each side of the assembly with a ½” X 4” bolt, lock nut and two, ½” SAE washers. DO NOT TIGHTEN.
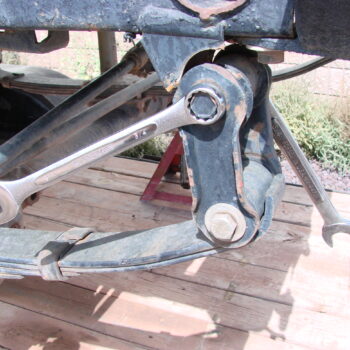
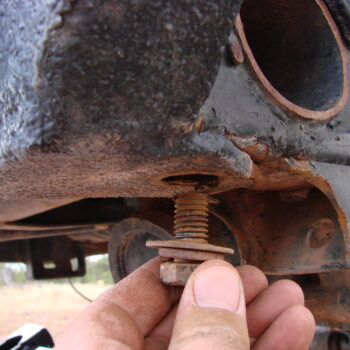
12) Install a 7/16” X 1” bolt, lock nut, and two 7/16” USS washers through the back of each bracket into the stock frame bracket. DO NOT TIGHTEN. (This is where I mentioned earlier that my stock mounts were torn off, #8 of these instructions).
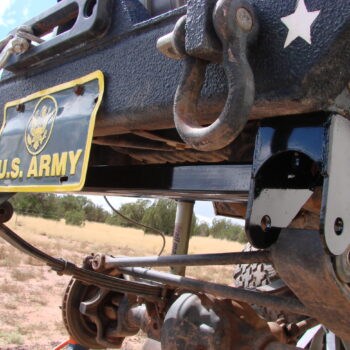
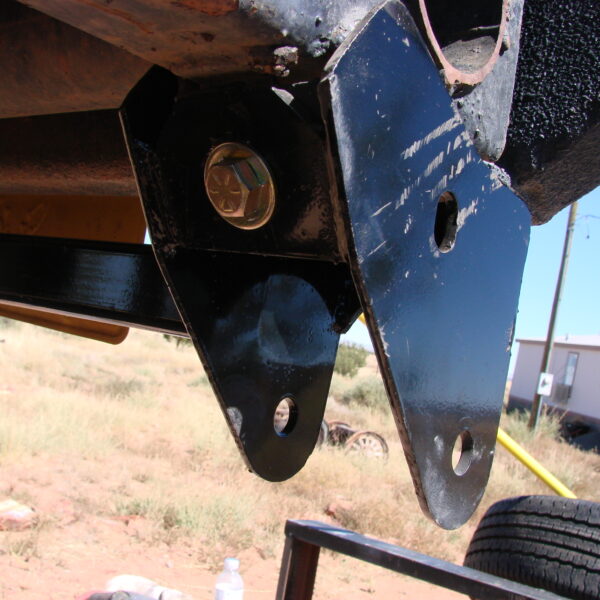
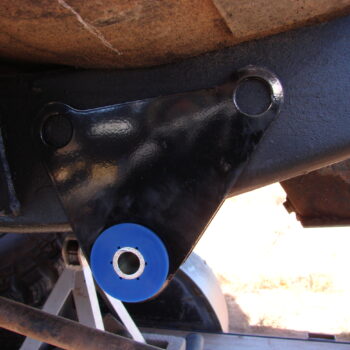
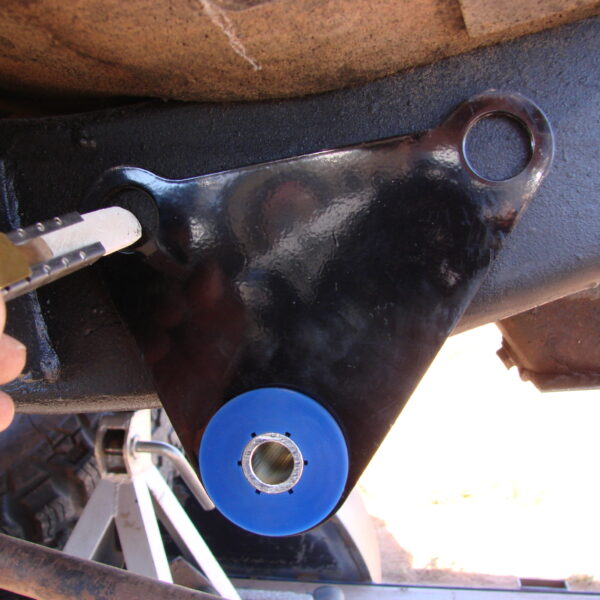
13) Tighten all mounting hardware. Tighten ½:” hardware to 60ft-lbs (or whatever the instructions per shackle reversal kits manufacturers’ specs require) and 7/16” hardware to 50ft-lbs. Tighten OE hardware to manufacturer’s specifications.
REAR PIVOT BRACKET REMOVAL:
The following steps should be performed on one side of the vehicle at a time, refer to manufacturer’s directions.
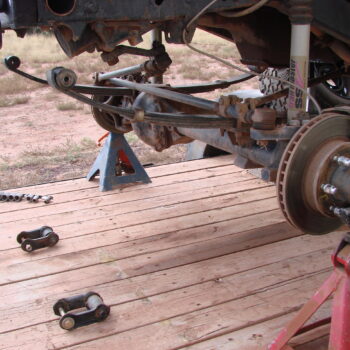
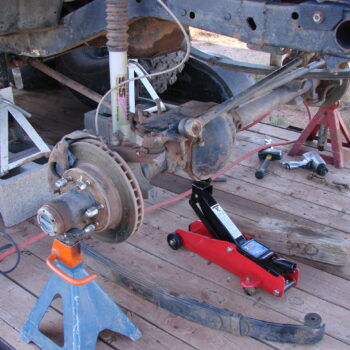
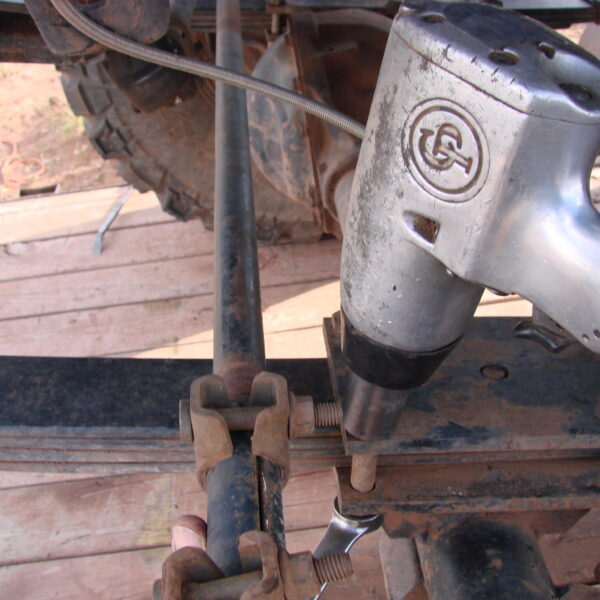
14) With the axle securely supported on jack stands, remove the driver’s side spring hanger bolt.
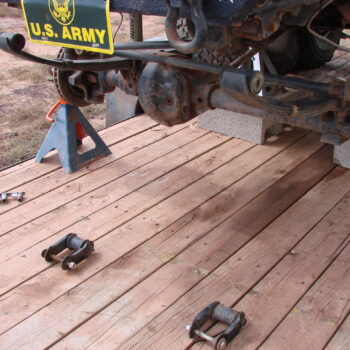
15) Remove the driver’s side spring u-bolts and remove the spring from the vehicle (the pictures here will be a little different from the instructions since I don’t have u-bolts on my Jeep, but you’ll get the general just of what’s being instructed to do).

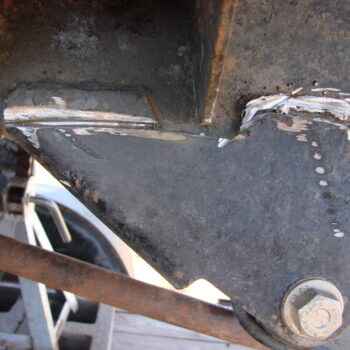
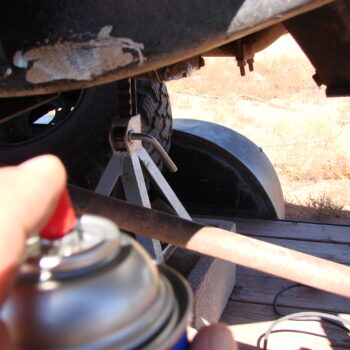
Caution: An abrasive cut-off wheel should be used to remove the rear OE pivot brackets from the frame. Care should be taken not to cut and/or damage the frame rails. GRIND ONLY THE WELDS.
16) Remove the driver’s side OE pivot bracket (or whichever side you happened to start with, again…. Do one side at a time) from the frame. Use a grinder to dress the frame and remove any sharp edges. (My springs were stuck in the pivot mounts so I just left them in and cut out the pivot bracket and removed the seized bolts after the fact, best to go by the directions when possible, this time due to the hard twisting I put the springs through the bolts just wouldn’t come out).
17) Coat all exposed metal with rust inhibiting paint or rubberized undercoating to prevent rust after the remaining welds have been ground down and the metal has cooled.
Caution: Measurements should be taken as accurately as possible to ensure proper axle alignment.
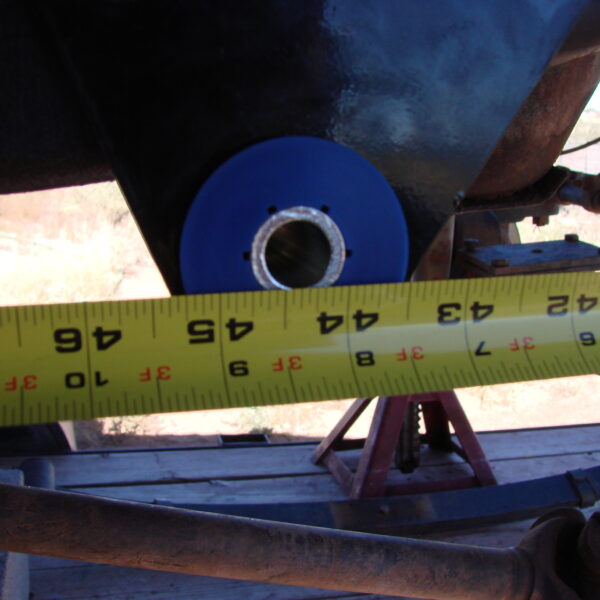
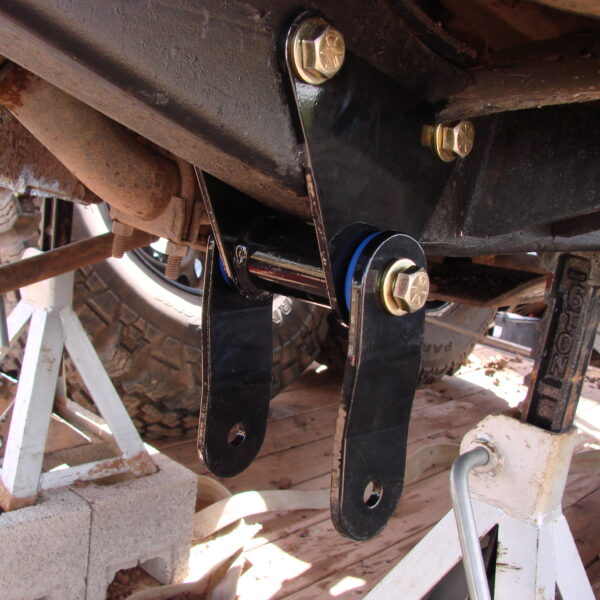
18) Measure from the center of the lower hole in the new front mounting bracket back on the frame rail 44-3/8”. Mark the frame at this point for reference.
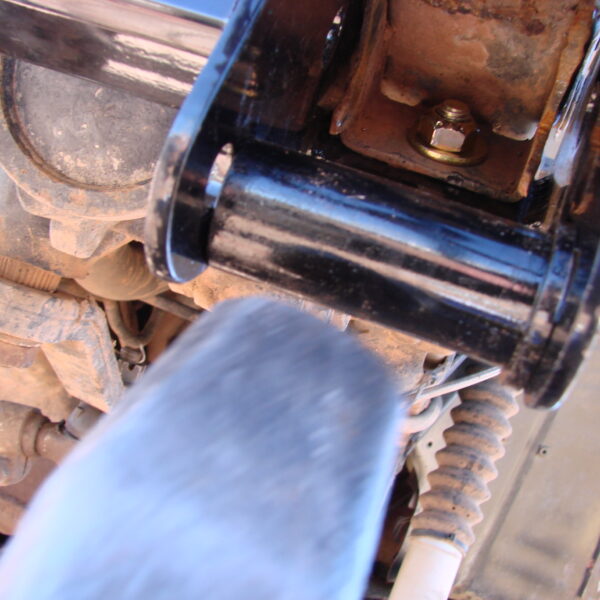
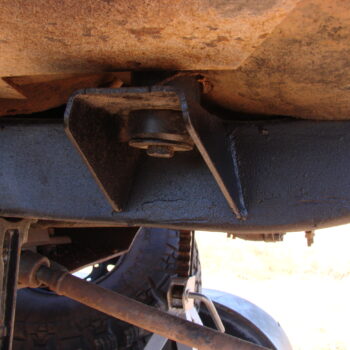
19) Place the new driver’s side mounting bracket on the frame rail. The large holes go toward the outside of the vehicle and the long end of the bracket goes toward the front. Adjust the bracket so that it is tight against the frame and the bushing hole is roughly lined up with the mark on the frame. (I have shown the bushing being installed here as well to get those in and help with aligning it up as close as possible with the mark made earlier).
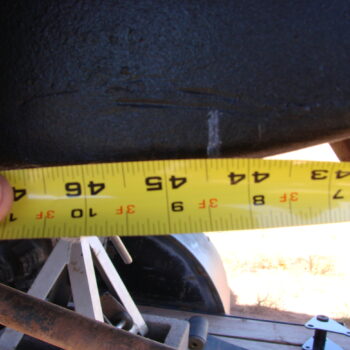
20) Measure back from the center of the lower hole in the new front mounting bracket to the center of the new shackle bushing mount. Adjust the bracket so the measurement is 44-3/8”. Once the bracket is placed properly, clamp it to the frame.
21) Using the bracket as a template, mark the center of the two mounting holes with a center punch.
22)Drill ½ “holes through all mounting points. The holes must go all the way through the frame.
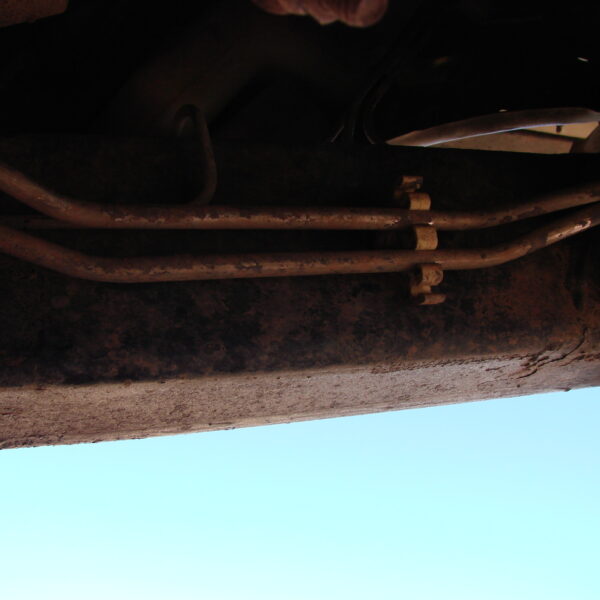
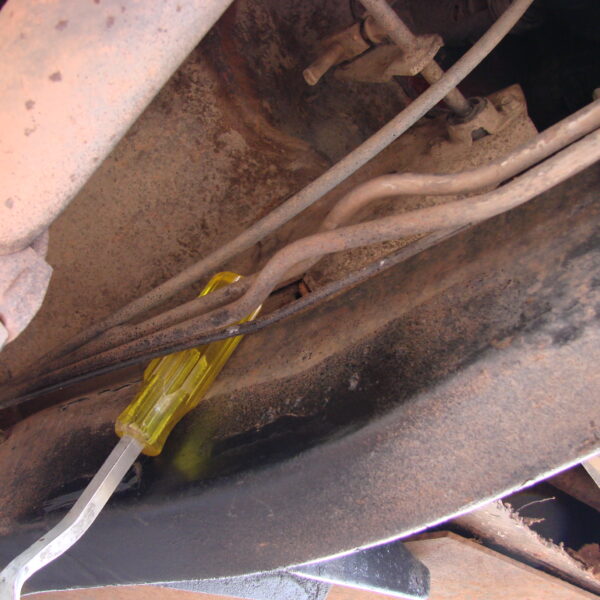
Caution: Take care to drill the holes as straight and level as possible to ensure that there are no axle alignment problems. You also want to check the back of the frame before you drill to verify that there are no fuel lines or any wiring that may be in the way or at risk of damage during drilling. (The best way to drill the holes is to start with a small bit and work your way up to the ½”hole instead of trying to do it with just a couple bits try with a half a dozen. It saves on your bits and makes the job quicker and easier).
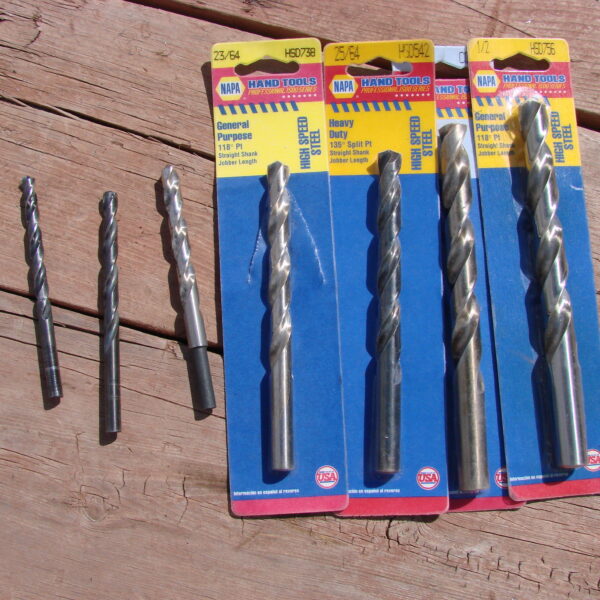
23) Drill the outside of the two holes with a ¾” drill bit. Note: Only drill through the outside wall of the frame rail.
24) Install the 0.750” x 2.430” long sleeves in the two large outside holes in the mounting bracket. Caution: DO NOT let the sleeves fall into the frame rail.
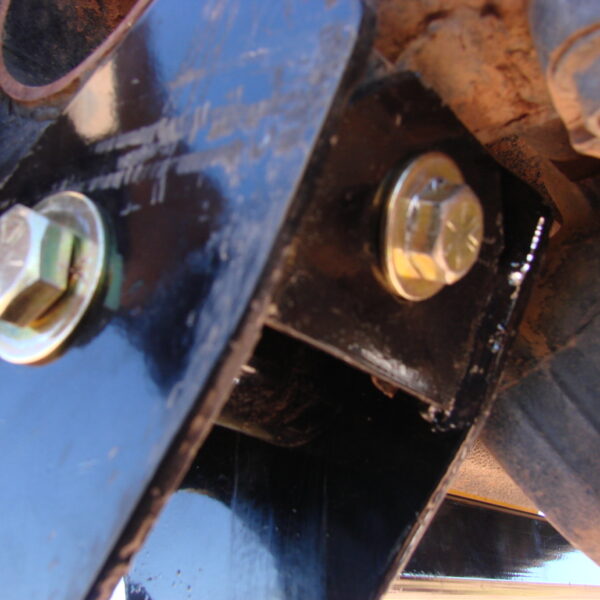
25) Install a ½” x 4” bolt, two SAE washers, and a lock nut in each of the mounting holes and sleeves. DO NOT TIGHTEN. Torque the ½” hardware to 60 ft-lbs.
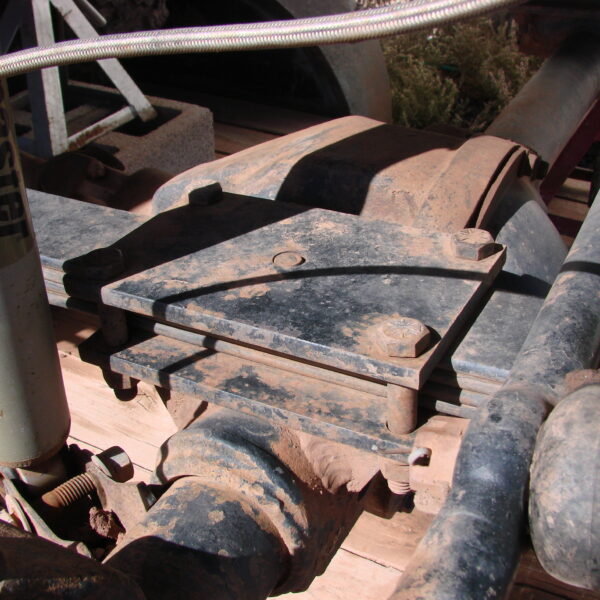
SHACKLE/SPRING INSTALLATION:
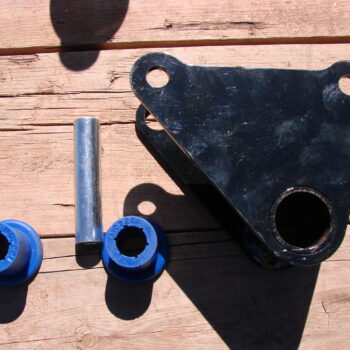
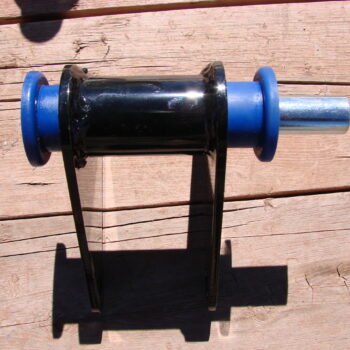
26)Install two new bushings and a ¾” x 3-3/8” sleeve into the new shackle mounting brackets. Install the grease fittings.
27)Loosely install the new offset shackle plates to the new rear mounting brackets with ½” x 4-1/2” bolt, nut, and SAE washers. The shackles should offset toward each other.
28) Locate the large diameter end of the spring. This is the end that was originally behind the axle and has a 9/16” ID sleeve. Place this end of the spring in the new front hanger bracket with a 9/16” x 4-1/2 bolt, nut and washers. Note: The spring is now turned 180 degrees from its original position. If the spring is equipped with a caster shim, it must be turned 180 degrees on the spring.
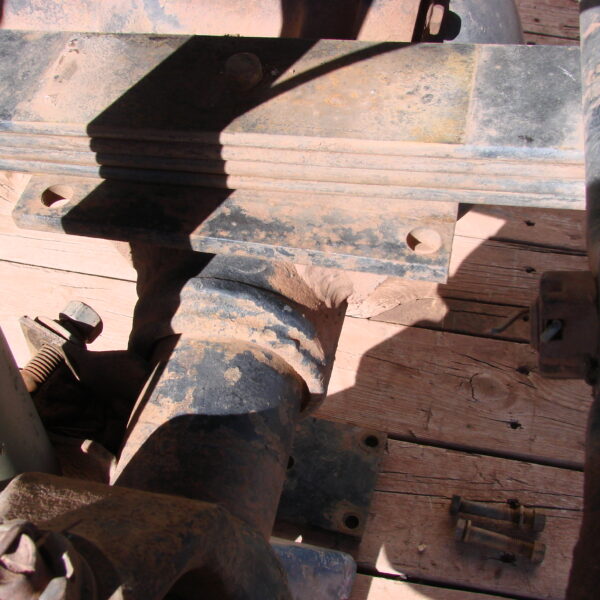
29)Swing the spring up to the shackles and attach using a ½” x 4” bolt, nuts and SAE washers. DO NOT TIGHTEN.
30)Loosely attach the spring to the axle with the u-bolts. The passenger’s side may need to be loosened in order to position the axle on the spring center pin. BDS strongly recommends replacing used spring u-bolts.

31) Repeat the installation process for the opposite side of the vehicle.
32) With the installation on both sides complete, snug the u-bolt hardware so that the axle is seated properly on the springs. Final u-bolt torque should be set with the weight of the vehicle on the springs.
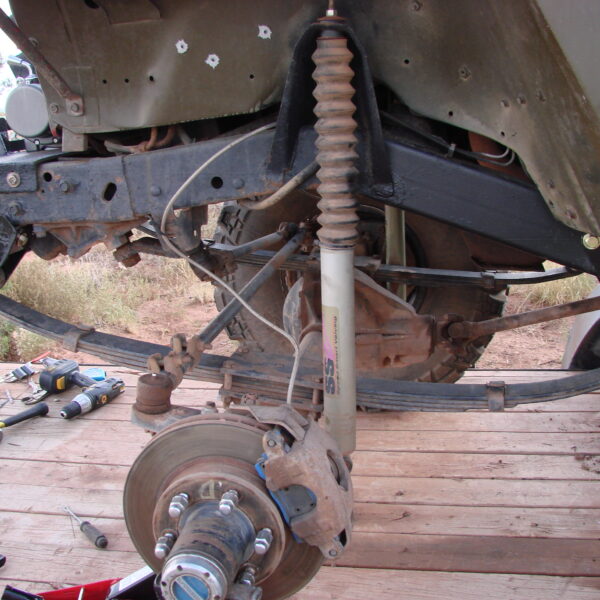
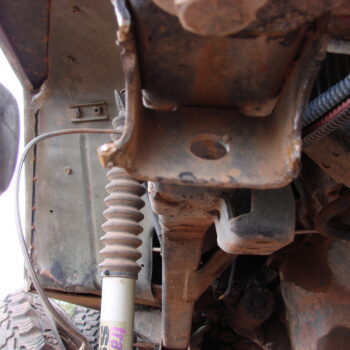
33) Install shocks to axle using the OE hardware.
34) Install wheels, remove jack stands and lower the vehicle to the ground.
35) With the vehicle on the ground, bounce the front suspension to settle the shackles into position.
36) Torque the shackle and pivot bolts. Torque the 9/16” front pivot bolt to 65 ft-lbs. Torque the ½” shackle bolts to 40 ft-lbs.
37) Check all fasteners after 100 miles and after any off-road use.